星期五, 1月 17, 2014
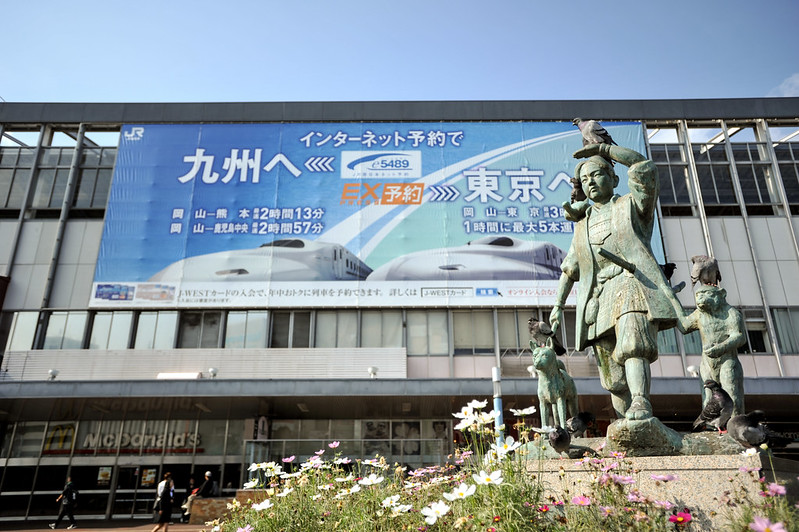
岡山。桃太郎-誤會如此美麗
本來,九天行程的安排是沒有算進要到岡山找桃太郎的。這行程,是個誤會。
從尾道一早離開,很順利的在中午就到了倉敷,放下了行李時間還早,Kiwi發揮了精實加精省的精神,說是要把JP 4-day pass用個徹底,估算了從倉敷到岡山的時間不過15分鐘車程,馬上說走就走,半小時後我們就跟桃太郎一起在岡山車站前碰面了,這孩子很喜歡小動物,還帶了小狗跟猴子一起來,至於停在頭上不禮貌的鴿子,純脆就是來搶戲的我們就不理會了。
閱讀更多 »
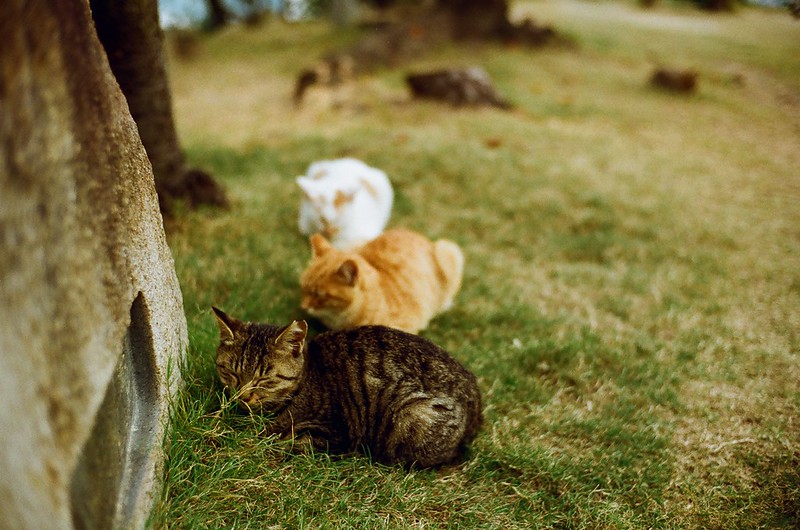
廣島。尾道(六)-貓之細道。招財貓美術館
藏在文學小徑旁的貓之細道小小一條,下山走快一點可能就錯過了左邊這條不起眼的精采小路。初秋的尾道天氣涼爽乾燥,散步在植物茂密沒有蚊子打擾的小徑,慢慢的欣賞尋找藝術家園山春二手繪藏身小徑旁神情百態的可愛福石貓,是屬於尾道小山城才有的特殊旅行樂趣。
閱讀更多 »
星期二, 12月 24, 2013
廣島。尾道(五)- 千光寺。貓咪在閒晃
搭纜車上千光寺山頂平台是認識尾道的最快方式,出了JR尾道站向左順著鐵路旁的小路,走上幾百公尺就可以看到纜車站。建議的走法是搭著纜車上山,跟著緩緩爬升的車廂,從空中認識尾道的海港地形、新舊時代交互融合的建築聚落。跟著文學小徑的路線指引,下山尋找迷人的貓之細道,運氣好的話可以幸運遇見許多不怕人不會跑走的可愛貓咪,跟他們近距離接觸一起玩樂喔。
閱讀更多 »
星期五, 12月 20, 2013
廣島。尾道(四)-艮神社
千光寺纜車站旁有條隱密小路,小路穿過纜車站右邊屋簷下往後而去,經過狹窄的巷弄後有個建築形式優美的山門迎接著腳步出現眼前,如果來到這兒只搭纜車上山,很容易就錯過了。這裡是尾道最古老的寺院-艮神社的入口。
走過了京都以及奈良各大寺院後發現,日本的寺廟建築並沒有所謂中軸動線以及兩端對稱分布的建築規則,也因此寺院的參道接上山門往正殿去的動線,有時候會有奇妙的轉彎,這樣的形式其實隱藏了空間縮放以及視線穿透性,提昇了參拜者跟著路線前進之下心情轉換的另一種樂趣。
閱讀更多 »
星期四, 12月 19, 2013
廣島。尾道(三)-西國寺
穿過鐵路下方的涵洞去拜訪神社,是尾道這兒的特殊走法,因為山勢地形的關係,山陽線鐵道把小鎮分成了兩邊,神社及寺院都隱身在拾階而上的山坡樹林綠意之間。攤開尾道的觀光地圖看看,沿著古寺巡禮所估計的三小時路線總共藏身了二十六間大大小小的古寺,這樣的密度與數量跟古都京都比起來真是絲毫不遜色。
閱讀更多 »
較舊的文章
首頁
訂閱:
文章 (Atom)